
If you are enjoying these projects, please donate to help us continue our work.
Lenten Sacrifice Calendar and Sacred Heart Project
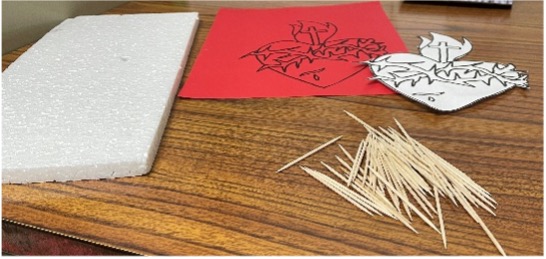
Items Needed
- Download the Sacred Heart picture template – click here
- Red or white paper
- Foam sheet
- Toothpicks
- Tape or glue
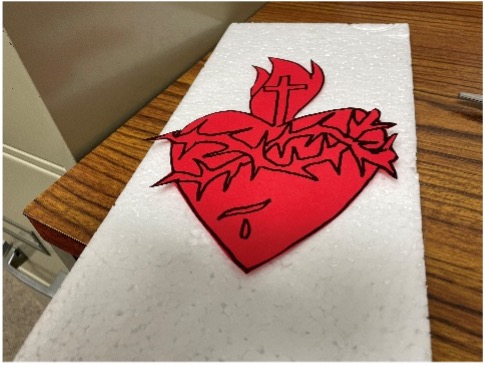
- Print the Sacred Heart template on red or white paper.
- Have your child color the Heart, if desired, then cut out the Heart.
- Tape or glue the Sacred Heart image onto the foam sheet.
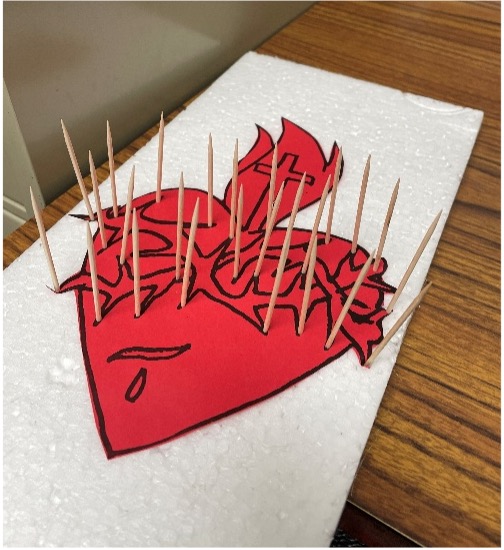
- Stick in toothpicks all over the crown of thorns.
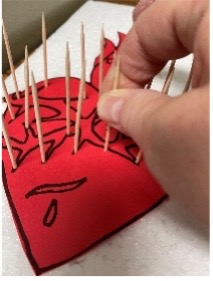
Each time your child makes a sacrifice he removes a thorn from Our Lord’s Sacred Heart. This is a great way to help children stay focused during Lent. Also available is a calendar of Lenten sacrifices for children.
Links for Supplies for the Sacred Heart Project
Foam Boards: https://amzn.to/4rOkewQ
Toothpicks: https://amzn.to/3MKWJGe
Red Paper: https://amzn.to/4tI3edu
Stations of the Cross Coloring Booklet
Stations of the Cross Coloring Booklet
The Tree in the Garden of Eden
Tell the children the story of Adam and Eve, and how the devil, disguised as a snake, tempted Eve.
Items Needed
- Construction paper – brown, green, yellow, and red
- Pom-poms – red or any color you prefer
- Googly eyes
- Pipe cleaner – any color
- Glue or hot glue
- Download the tree and snake templates – click here
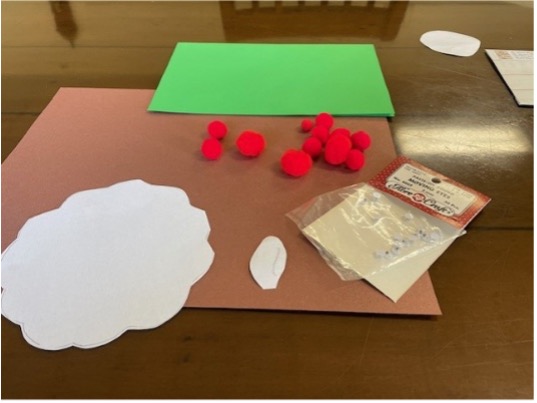
- Gather supplies
- Cut out a 4 ½ in. x 6 in. rectangle out of brown paper.
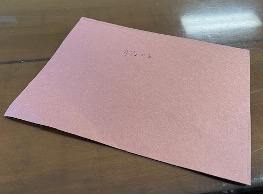
- Roll paper into a tube and glue closed with a hot glue gun or tacky glue.

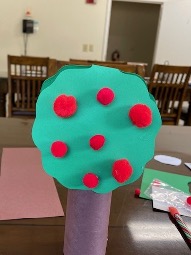
- Fold the green paper in half, and cut out the tree shape (using the pattern), making sure to leave the top edge of the treetop shape connected at the fold.
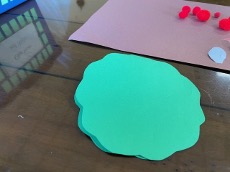
- Attach the treetop to the trunk.
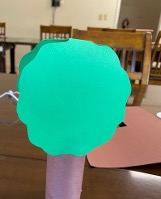
- Glue on pom-poms for apples.
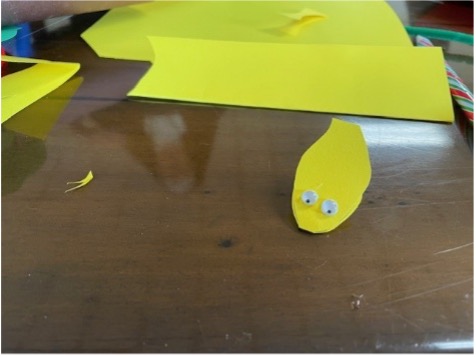
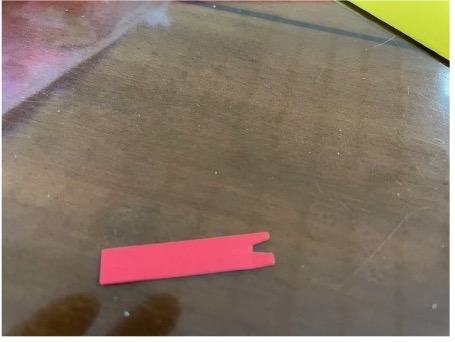
- Fold yellow paper, and cut out the snake shape, making sure to leave the flat edge connected at the fold. Glue on googly eyes. Cut out the snake tongue from red paper. (See attached patterns.)
- Glue the snake head to the pipe cleaner.
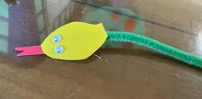
- Now wrap the snake around the tree and your project is finished.
Links for Supplies
Construction Paper: https://amzn.to/4aERm39
Pom-Poms:
Red: https://amzn.to/4apP8pH
Variety Colors: https://amzn.to/4aAGlA4
Pipe Cleaners: https://amzn.to/46dWzhb
Googly Eyes: https://amzn.to/4rnFgTh
St. Joseph Coloring Page
Audio Story and Coloring Page
St. John Bosco and the Miracle of More Hosts
Lenten Sacrifice Calendar and Sacred Heart Project
Items Needed
- Download the Sacred Heart picture template – click here
- Red or white paper
- Foam sheet
- Toothpicks
- Tape or glue
- Print the Sacred Heart template on red or white paper.
- Have your child color the Heart, if desired, then cut out the Heart.
- Tape or glue the Sacred Heart image onto the foam sheet.
- Stick in toothpicks all over the crown of thorns.
Each time your child makes a sacrifice he removes a thorn from Our Lord’s Sacred Heart. This is a great way to help children stay focused during Lent. Also available is a calendar of Lenten sacrifices for children.
Links for Supplies for the Sacred Heart Project
Foam Boards: https://amzn.to/4rOkewQ
Toothpicks: https://amzn.to/3MKWJGe
Red Paper: https://amzn.to/4tI3edu
Stations of the Cross Coloring Booklet
Stations of the Cross Coloring Booklet
According to the Method of St. Alphonsus
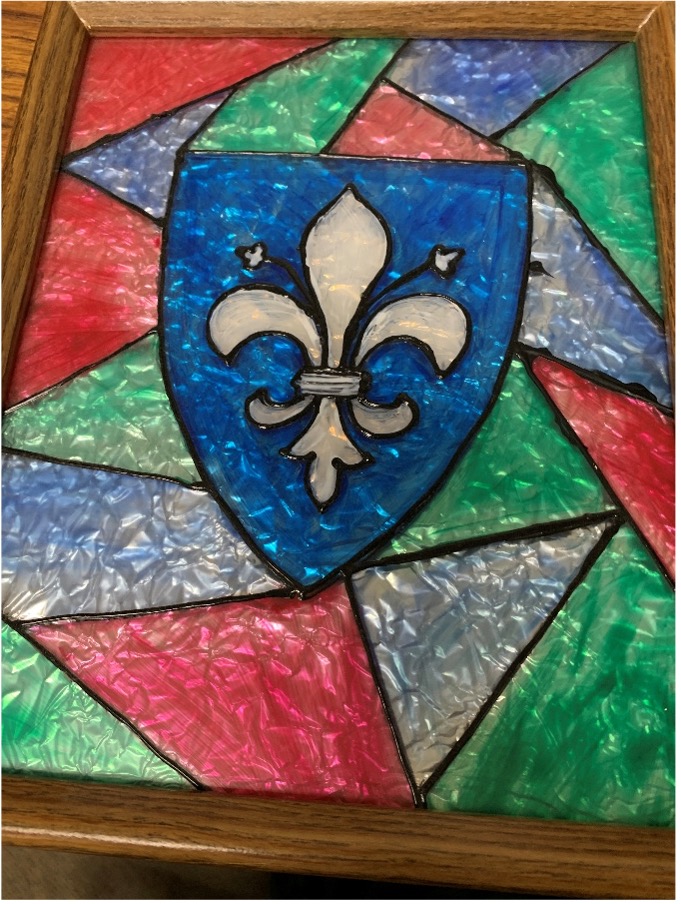
Stained Glass Window
Items Needed
- Inexpensive frame with glass
- Assorted acrylic paints, including black
- Clear glue
- Ruler
- Black Sharpie marker
- Paint brush
- Q-tips
- Aluminum foil
- Rubbing alcohol
- Emblem – see attached
- Tape
- Elmer’s white glue
- Paper plate
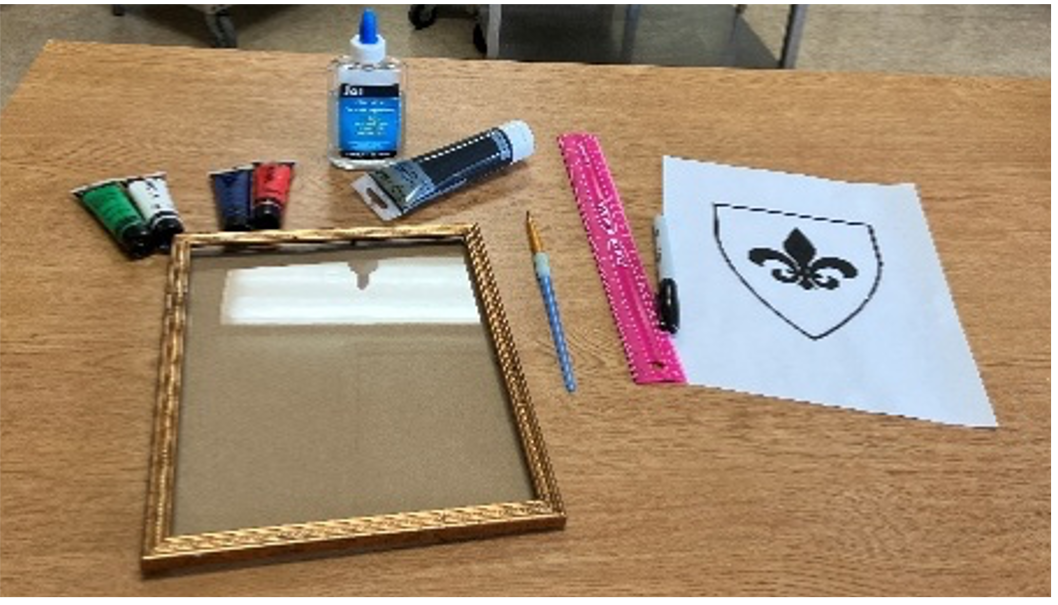
- Download the emblem template below.
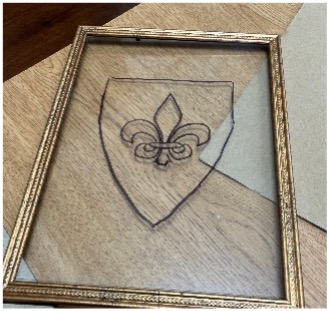
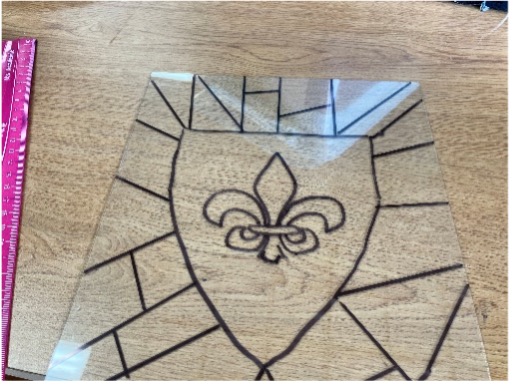
- Make sure the frame and glass are clean. Tape the emblem to the inside of the glass. See Picture #1.

- With the Sharpie marker trace the emblem onto the outside of the glass. See picture #2.
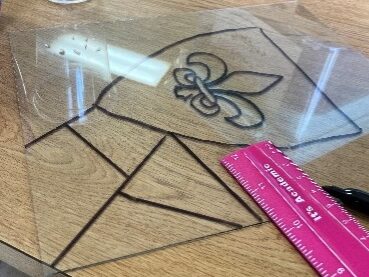
- Once you have finished tracing, use a ruler to draw straight lines for the stained-glass look. If you make any mistakes while drawing with the marker, use rubbing alcohol to remove Sharpie marks. See pictures #3 & #4.
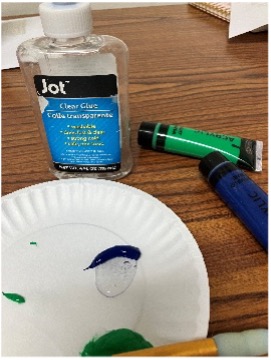
- Now, using the paper plate as a palette, mix a dab of clear glue and a dab of paint. See pictures #5 & #6. More glue will make the picture more opaque.
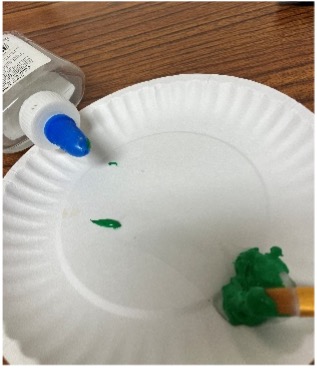
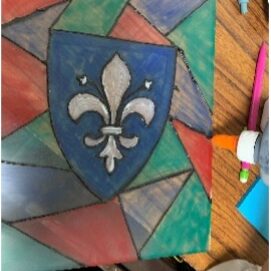
- Paint the window on the inside of the glass so you do not paint over the black lines. Be sure to clean your brush when you change colors. Set aside the glass to dry. See picture #7.
- Next, enhance the black outlines. Add some black paint to the bottle of Elmer’s glue and stir well. See pictures #8 and #9. Add more paint if needed to make the mixture very dark.
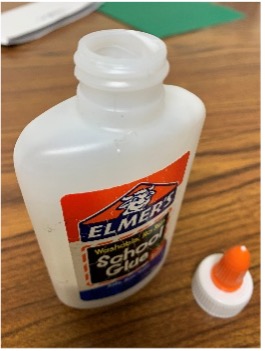
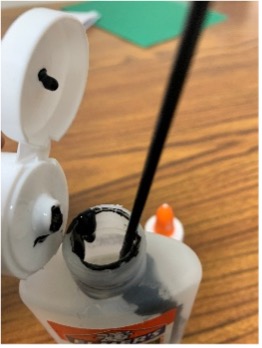
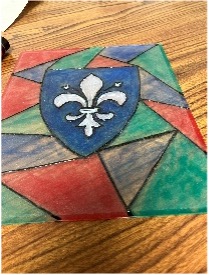
- Put the cap back on the glue and slowly apply the black glue along the marker lines on the front of the glass. See pictures #10 & 11.
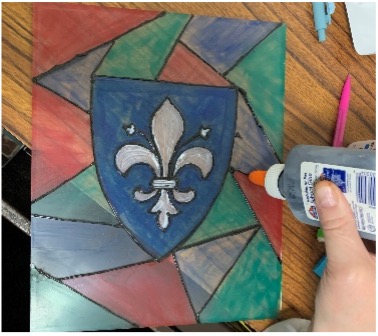
- Before the black glue dries, take a toothpick and pop any air bubbles you may see. It is normal that the black glue will spread a little.
If you wish, instead of using the black glue, you could simply use a Sharpie marker and trace over the lines you have already made to make them thicker. This works well on smaller frames.
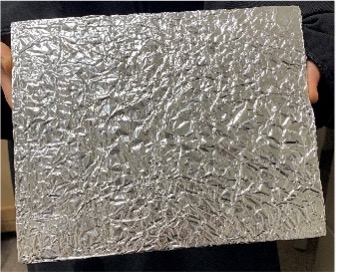
- For the finishing touch, take a piece of aluminum foil measured a little larger than your frame. Crumple it up so that it is all crinkly, then spread flat again. Put this on the back board of your picture. See picture #12. Put your picture together once everything is dry and you are all finished.
Links for Supplies for Stained-Glass Projects
Picture frames:
https://amzn.to/4qF21kt
Paints:
https://amzn.to/4tK409M large group
https://amzn.to/4rrf9uX small group
Clear Glue:
https://amzn.to/4aXTKDx large group
https://amzn.to/4kIpZKl small group
White Glue:
https://amzn.to/4aUMA2W
Markers:
https://amzn.to/4rsYIhA large group
https://amzn.to/4qFtFOt small group
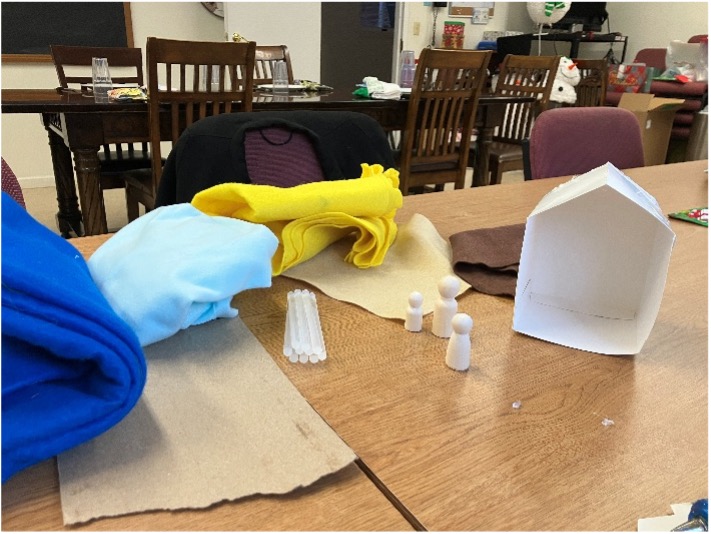
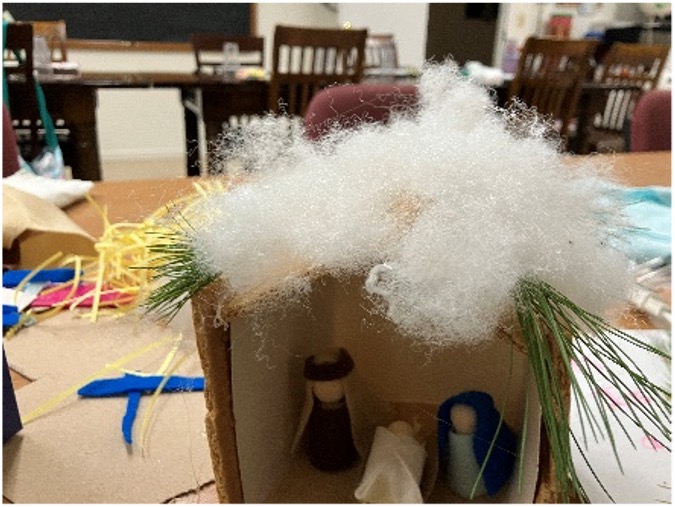
Holy Family’s House in Bethlehem
This is a great project for you to make with your child to help them remember the true meaning of Christmas and the Christmas season. The Month of January is dedicated to the Holy Family. What better way for us to remember the stable in Bethlehem and to imitate the Holy Family?
Items Needed
- 1 Box measuring 5”x5”
- Felt:
- Light blue
- Royal blue
- Brown
- Tan
- White
- 3 Peg people (varying sizes)
- Construction paper:
- Brown
- Yellow
- Hot glue
- Regular Glue
- Poly-fil or fake snow
- Sheet cardboard
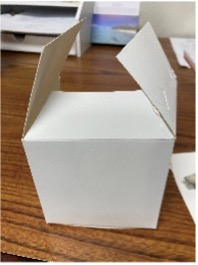
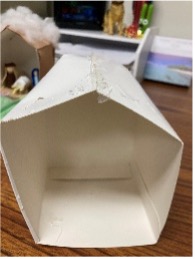
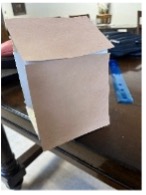
- Assemble the box, forming a peak with the lid. – See pictures 1, 2, and 3.
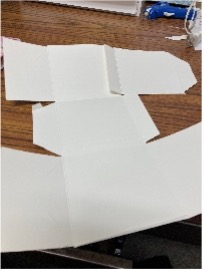
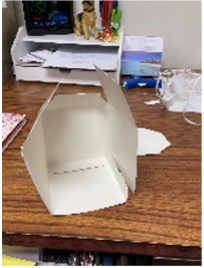
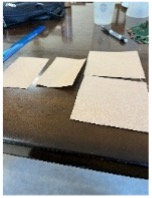
- Cut out one side of the box. – See picture #4.
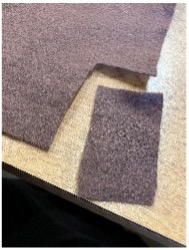
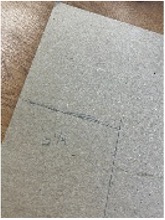
- Measure the box and cut out squares of brown paper to fit the sides and peak. – See pictures 5 and 6.
Glue paper onto the box and let dry.
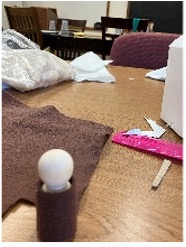
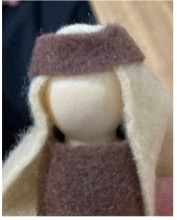
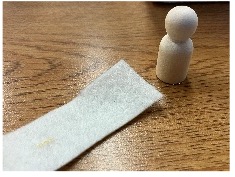
- Now cut a rectangle of brown felt to wrap around the largest peg person to make St. Joseph. – See pictures 7 and 8.
Glue to peg using hot glue.
- Cut a rectangle of light brown felt and make a tuck in the middle of one of the long sides, gluing together inside the tuck. Place the open side on St. Joseph’s head. – See pictures 9 and 10.

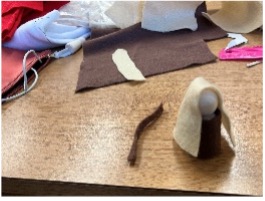
- Take a small strip of brown felt and wrap around St. Joseph’s head for band. – See picture 11.
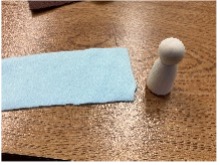
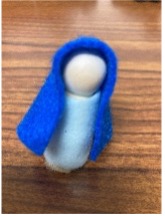
- Now cut a rectangle of light blue felt for Our Lady, wrap around her body and glue. – See Picture 12.
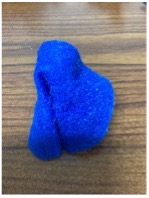
- Cut dark blue felt for Our Lady’s veil and glue in center (as done for St. Joseph), then place on head for her veil. – See pictures 13, 14, and 15.

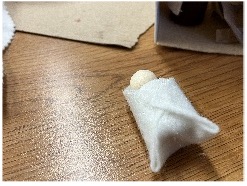
- Cut a rectangle of white felt, wrap around smallest peg person, and glue to make the Baby Jesus. Cut a square of white felt for the baby blanket. Fold the square around the Baby and glue. See pictures 16 and 17.
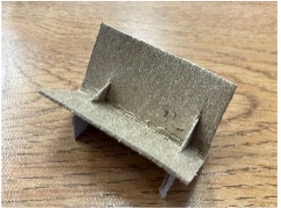
- Next make the manger by cutting a small square of cardboard and folding in half. Cut a small slit on each end. Slide two matching strips of cardboard into slits. Open up and you have a manger. See pictures 18 and 19.
- Cut yellow paper into small strips for hay and place in the manger.
- Cover the floor of the manger with a square of felt (any color). Add the Holy family and glue down. See picture 20.
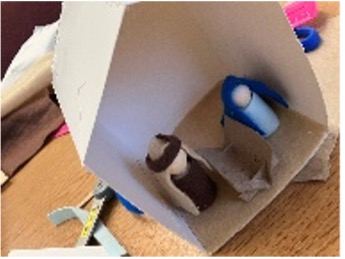
- Decorate the top of the manger with fake snow, leaves, or whatever you wish.
Place this Nativity scene in your child’s bedroom to remind them of the true meaning of Christmas.
Links for Supplies for the Project
Wooden Peg Doll: https://amzn.to/3MLRtlP
Hot Glue Gun and Sticks: https://amzn.to/4aQMnhv
Brown Construction Paper: https://amzn.to/4cjrvAz
Felt Sheets: https://amzn.to/4cOquk4
Fake Snow Powder: https://amzn.to/4aS78I9
Poly-fil: https://amzn.to/4r1K284
White Kraft Paper Favor Boxes:
https://amzn.to/4aS5hDb small group
https://amzn.to/4sa8VPQ large group
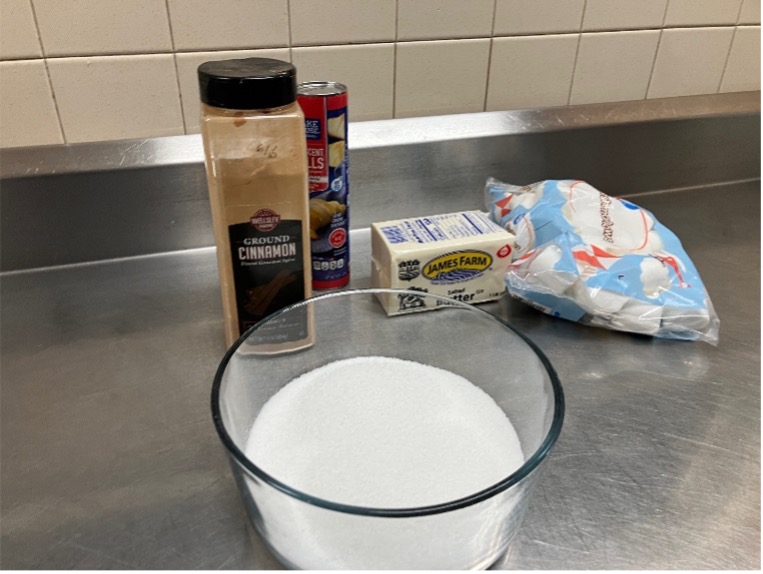
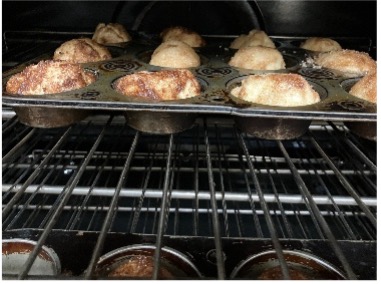
Empty Tombs
This is a great recipe that Moms can do with children and teach them about Our Lord’s Resurrection. They are called empty tombs in honor of Our Lord. On the day of the Resurrection the holy women went to anoint His body, and they found the tomb empty.
These are delicious sweet rolls with a gooey filling. The marshmallow melts as it bakes and leaves a hollow center. Hence the name “Empty Tombs”.
Items Needed
- 1 8oz package of croissant roll dough
- 1 bag regular size marshmallows
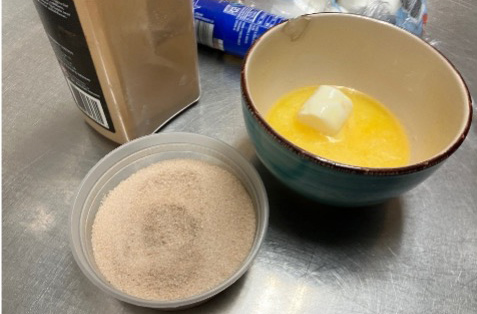
- ½ c sugar
- 1 ½ T cinnamon
- ½ c melted butter
- Greased muffin tin
- Preheat oven to 375°
- Melt butter and set aside
- Combine sugar and cinnamon in dish and stir together
- Separate rolls into 8 triangles
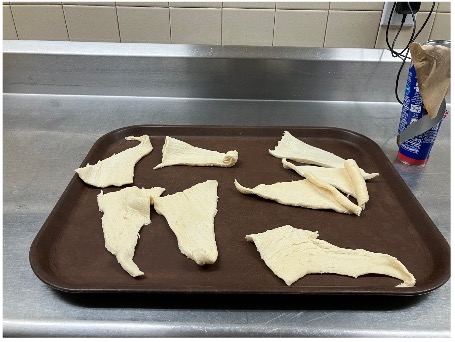
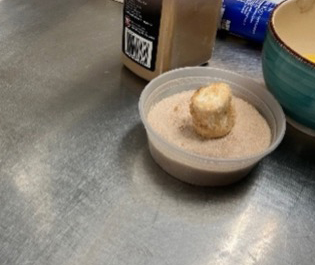
- Dip marshmallow in butter then roll in cinnamon sugar, place in center of croissant dough and wrap well. Make sure there are no cracks.

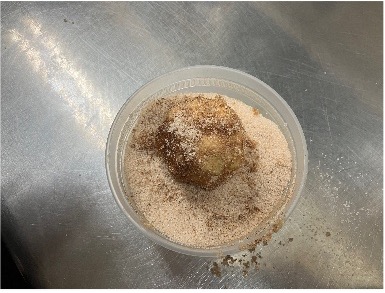
- Dip dough into melted butter, roll in cinnamon sugar and place in greased muffin tin.
- Repeat until all the triangles are used.
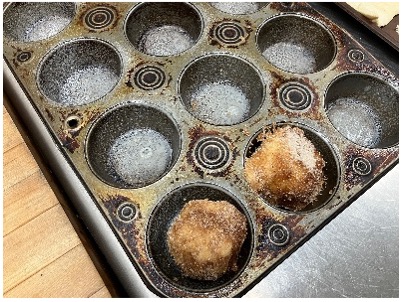
- Bake in oven 375o for 10 to 15 minutes or until golden brown. Allow to cool slightly and eat warm.
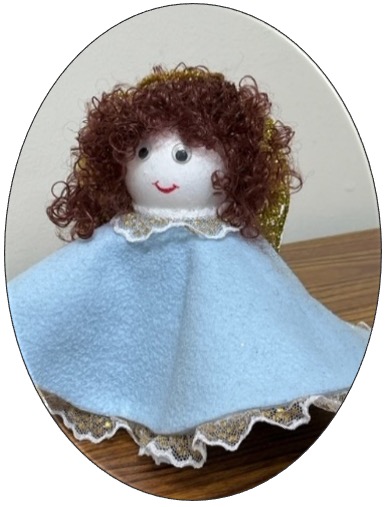
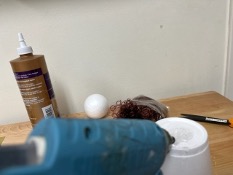
Angel Project
Materials Needed
- Styrofoam cup 9oz-12 oz
- 2 ½” Styrofoam ball
- felt – any color
- doll hair or yarn – any color
- googly eyes
- lace trim – if desired
- rickrack – if desired – Walmart or Amazon
- pipe cleaner – gold or any color
- gold glitter paper
- scissors
- hot glue or fabric glue
- red marker
- template for wings
How To Make Your Angel
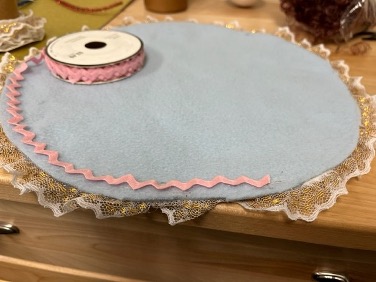
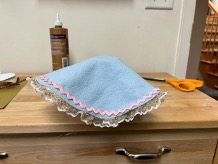
- Cut a circle of felt 9 in. in diameter – can use a 9 in. paper plate for a template
- Glue lace trim around edge of felt circle (see picture #1).
- Flip felt onto right side and glue on rickrack border if desired (see picture #2).
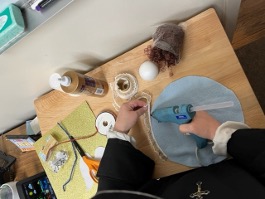
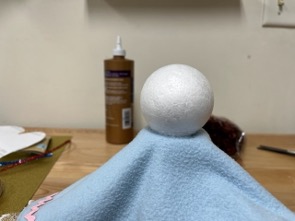
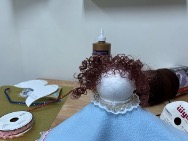
- Stand cup upside down and glue base of cup to center of felt circle to form the body of the angel (see picture #3 & 4).
- Glue Styrofoam ball to body for the head (see picture #5).
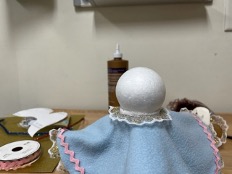
- Glue lace to neck if desired (see picture #6).
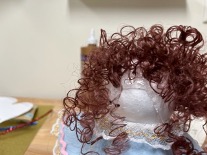
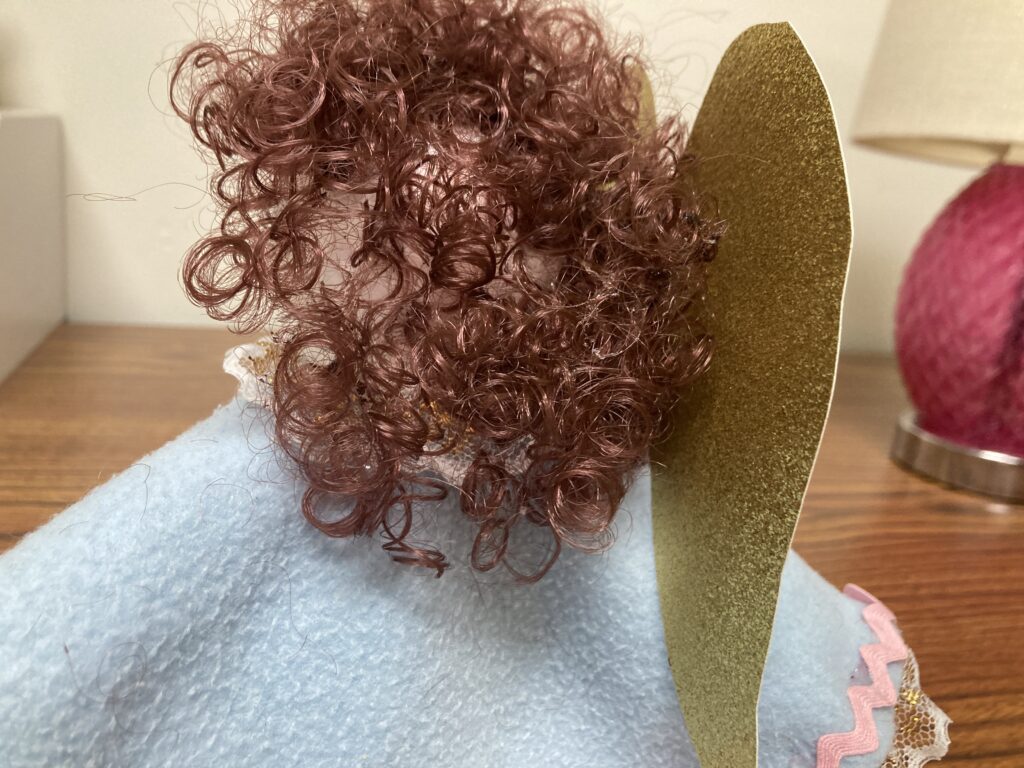
- Glue hair to head. You can use doll hair or yarn according to preference (see picture #7 & 8).
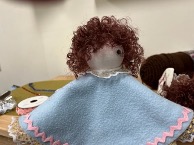
- Glue on the eyes (see picture #9).
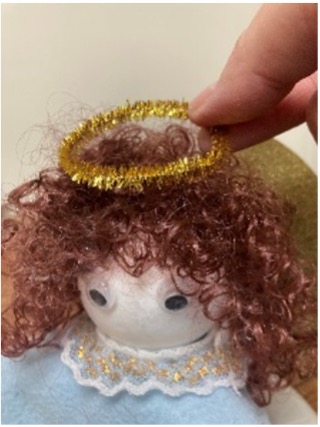
- Now form a halo in a circle using pipe cleaner. Glue onto the head (see picture #10).
- Using the wings template below trace wings on glitter paper. Carefully glue to the back (see pictures #11 and #12).
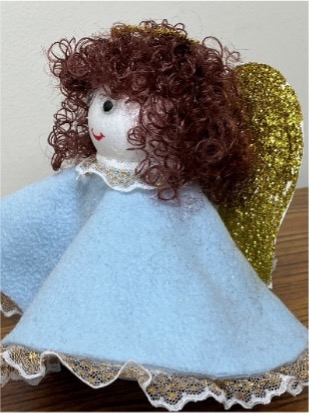
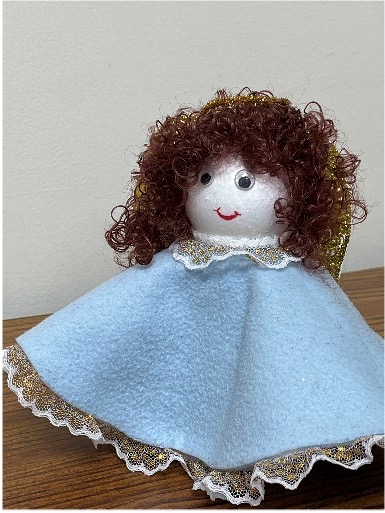
- With a red marker add a smile (see picture #13).
Your Angel is now complete.
Remember to pray to your Guardian Angel every day to help you be good.
Where To Purchase Some Supplies
- 2 ½” foam ball
https://www.amazon.com/Polystyrene-Styrofoam-Sculptures-Arrangements-Modeling/dp/B08R78KHJX/?th=1 - felt – any color
https://www.amazon.com/Assorted-Squares-Nonwoven-Patchwork-15x15cm/dp/B01MRWZEMV/ - doll hair or yarn – any color
https://www.amazon.com/Hygloss-Products-Colors-Curly-Assorted/dp/B07CL97VWL/ - googly eyes
https://www.dollartree.com/crafters-square-plastic-googly-eyes-125ct-packs/177528 - lace – if desired
https://www.amazon.com/Gathered-Trimmings-Embroidered-Applique-Embellishment/dp/B0797SJ4LL/ - pipe cleaner – gold or any color
https://www.amazon.com/Caydo-Pipe-Cleaners-Chenille-Decorations/dp/B0DQSWMGKT/ - glitter paper
https://www.amazon.com/SALEMAR-Cardstock-Sparkling-Scrapbook-Multicolor/dp/B0BXX66CN6/ - hot glue or fabric glue
https://www.amazon.com/Liumai-Switch-Crafts-Sticks-Project/dp/B0CP5M7MSQ/
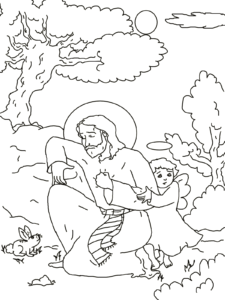
Jesus in the Garden Coloring Page
St. Patrick Coloring Page
St. John Bosco Audio Story and Coloring Page
Audio Story and Coloring Page
St. John Bosco – A Dream Vision of the Evil Animals

Explanation of Holy Week Ceremonies
by Father Colin Buckley, C.S.P.V